
I originally was looking for a good quality helium balloon (which I have used previously for other pinata's) but after a discussion with the shop lady she suggested a ball. I wasn't sure to begin with thinking a ball might me too thick but this one is a cheap $3 ball from one of those variety shops. You'll also need some vaseline, strips of old paper, prepared wallpaper glue and a bowl or stand to put the ball/balloon in.

Give the ball a coating of vaseline as this helps the ball (or balloon) come away easily when the paper mache' has dried properly. I had no vaseline this time so I just used a coating of coconut oil.

Coat the paper scraps each side with the glue and start placing them overlapping over the whole surface. Let this layer fulling dry.


Then a second layer, let this dry.

A pinata needs to be hung up so I attach a ribbon right round (plus extra obviously so you can tie it around a pole for hanging) and secure it with tape then paper mache over it with a white layer.


Then so a second layer using different white toned paper so you know the difference between layers. Let thsi dry.


Staple around opening to secure the ribbon, then paper mache over the staples.

Mark out where you want the mouth to be. Pop the with the craft knife carefully.
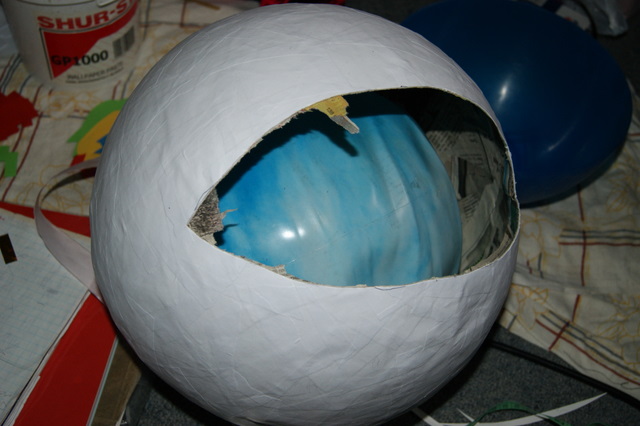
Carefully cut out the mouth piece.

I taped 2 pieces of card together for a hinge effect and place in to Pacman's mouth and traced the round outline and cut to fit. I stuck black paper (A4 folded in half and pasted over the hinged card) over it.

Place the 'mouth' in the gap and cut the over hang pieces so they can be glued down.

Paper mache over with white pieces and leave to dry.

Paint the white yellow.

Nearly finished. Glue some funky eyes on.

Walaa! There he is!
B-B
That is FREAKING AMAZING!
ReplyDeleteSooooo cool!
ReplyDeleteThat's awesome!!!!!
ReplyDeleteOh my gosh...snap! I just finished making a Death Star pinata for Mr. 5's upcoming birthday using mostly the same kinda technique! Fun if a little time consuming, no?!
ReplyDeleteSo lovely to meet you and your blog :-)